|
Custom Analytical Instruments
|
|
Most of the instruments built by PAI are protected by confidentiality
agreements, and cannot be described here. Some of the more generally
applicable instruments are described below. Our instruments generally
integrate several of the following state-of-the-art technologies:
1)
Precision motion control (including multiple axes, we have integrated
as many as 7 axes in a single application)
2) Precision force
measurement (load cells, inductive coupling)
3) Precision surface
analysis (optical or electron beam)
4) Fluid handling
(pumps, solenoid valves, pressure control)
5) Fully integrated
systems, with user-friendly computer software operation and analysis.
To meet the demand for custom instruments we maintain
an instrument shop equipped with metal fabrication and electronic
equipment. Add to this our computer and software capabilities, and
we have everything we need to produce your custom instrument under
one roof. Please don't hesitate to call us regarding your particular
instrumentation requirements.
|
|
|
|
Precision
Force Applicators (PFA)
|
|
|
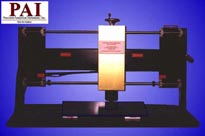
Precision Force Applicators are flexible instruments
useful for applying forces at interfaces under controlled conditions.
Many configurations are available, permitting several types of force
application. Precision Force Applicators are useful for performing
precision abrasion, cleaning, and polishing, and for applying compression
and/or tension to an interface. In addition to providing a rugged and
reproducible testing environment, the instruments also record a variety
of useful data related to the physical properties and conditions of
the sample materials or sliding interfaces. Accordingly, properties such
as lubrication, friction, effect of wear, and response to stress can
be quantitatively monitored and evaluated.
Download PFA Tech Brief
|
|
|
|
Scanning
Laser Microprobes (SLM)
|
|
|
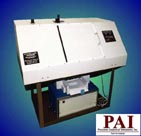
Scanning Laser Microprobes are powerful and flexible
instruments for evaluating the optical properties of surfaces. Although
the standard SLM is typically applied to nearly-flat reflective or
transparent surfaces (such as glass, mirrors, tiles and other hard
surfaces, as well as textured surfaces including wood, paper, and cloth),
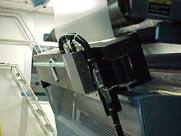
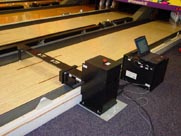
SLM's have been employed for quality control of moving materials, and
have also been employed for making precise 2-D and 3-D non-contact dimensional
measurements. Many configurations are available, ranging from fully integrated
computer controlled research and development instruments to application
driven devices customized for quality control and/or in-line monitoring
in manufacturing settings. Instrument specifications are typically customized
to maximize sensitivity and efficiency in the final application.
The standard microprobe simultaneously measures four
independent physical phenomena that occur when light strikes a surface:
specular reflection, diffuse reflection, specular transmission, and
diffuse transmission. The extent to which these phenomena occurs is
directly related to the surface roughness, topology, gloss, and the physical-chemical
nature of any foreign substance present at the surface. Consequently,
automatic total-area mapping combined with numerical and statistical
analysis of these quantities constitutes useful quantitative information
about surface cleanliness, transparency, uniformity, and the nature of
any coating present. A spectroscopy option is also available, which
provides reflection and transmission information as a function of incident
wavelength.
Download SLM Tech Brief
|
|
|
The "Vise"
|
|
|
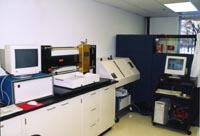
The combination of Precision Force Applicator and
a Scanning Laser Microprobe, affectionately referred to as "The Vise,"
has proven to be an effective strategy for product testing and development.
Test parameters are essentially "squeezed" between reproducible product
application with the PFA (one side of the vise) and objective evaluation
with the SLM (the other side). This strategy constrains the experimental
variables, requiring fewer test samples to reach more precise conclusions
concerning product performance. Testing throughput is increased dramatically,
and subjective conclusions are precluded.
|
|
|
Laboratory Potentiostat
|
|
|
|
Potentiostats are employed in situations
where electrode current and potential need to be controlled and monitored.
Designed for use in a three-electrode configuration (reference, auxiliary,
and working), this bench-top instrument is designed for researchers requiring
rugged, straightforward access to electrochemical control and measurements.
Manual controls are located conveniently on the top panel, and analog
outputs are provided for an X-Y chart-recorder or analog computer interface.
Although less sophisticated than other, more expensive, devices, the Laboratory
Potentiostat is designed to be a real work-horse for the research
environment!
|
|
|
|
Pyrolytic
Water Distillation Device (TDW)
|
|
|
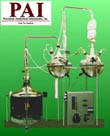
Need really clean water for your research
project? This device boils distilled water, mixes the water vapor
with pure oxygen, passes it through a platinum gauze at 600°C
(a 'pyrolyzer'), condenses the distillate in a second flask, and then
distills it again. Thus, the final product has been distilled three
times, and is devoid of any organic material (except for CO2, of course).
Mass spectroscopic analysis of the final product has shown that the
largest contaminant is glass! The instrument produces approximately 6-8
liters per day.
|
